Site Configuration
To configure the site you either have to have Site Configuration or Admin privileges. Configuration is used for managing many (but not all) of the portal characteristics. Sites, instruments, and variables are configured on their own specific pages.
Logging In
- Click “Sign In” located at the upper right corner of your portal
- Log into your portal using
User: admin@chordsrt.com Password: realtimedata - Change your password by clicking “Users”
- Click on “admin@chordsrt.com”
- Click “Edit User”
- Click “Change Password”
- Enter your new Password and use realtimedata as the old password to save the changes
- Click “Update”
All Done!
Creating Users
Users can create their own accounts but admins will have to give them permissions to view and work on other parts of the portal. To create/become a new user:
- Click “Sign In” in the upper right corner of your Portal
- Click “Sign Up”
- Enter your Email and enter your new Password, minimum of 8 characters long
- Click “Sign up”
You will automatically be set to “guest” so an Admin will need to change your permissions before you can do more on the portal.
Tip for Admins If you want to check user permissions while using two windows in your browser either make one browser incognito mode or open a new window in another web browser. Otherwise you will mix up the sites cookies and have to clear your browser cache.
Portal Configuration
Admins can edit the portal configuration as well as users with Site Configuration permission.
Google’s new Dataset Search service (see https://toolbox.google.com/datasetsearch) allows users to locate relevant datasets across the Internet. CHORDS creates what is know as a JSON-LD encoding and schema.org conventions to allow your real-time streams to show up in these searches.
To configure these options, click on “Configure” selection in the upper right part of the screen. It will take you to a page called Configuration.
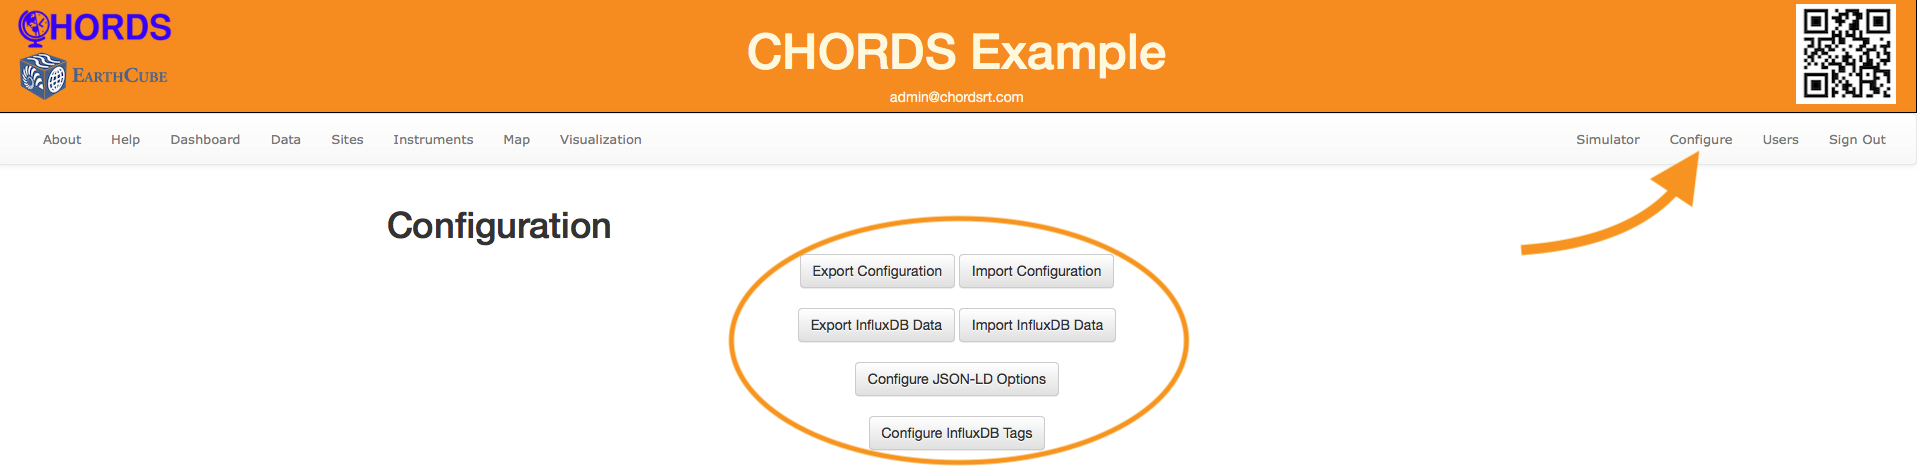
Next click the button labeled “Configure JSON-LD options”
You will see a new page, click on “Edit”. After that fill out:
- Name
- Description
- Keywords
- URL
- License
- DOI (use the CHORDS DOI of 10.5065/D6V1236Q if you don’t already have an assigned DOI)
And click “Save”
The “Description” and “Keywords” fields are important as they determine the search keywords that Google Dataset Search will use to find your real-time streams. You can find out more about this from project 418 or by investigating Wiki and schema.org.
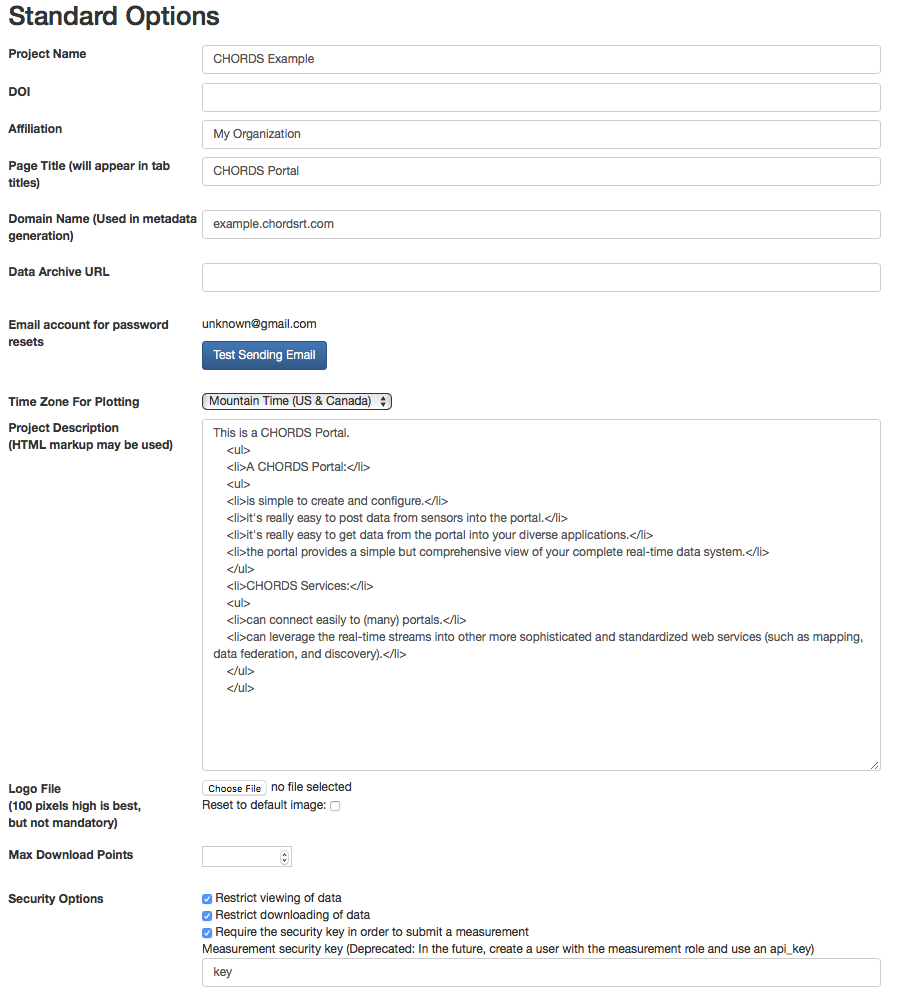
- Fill out the following under Standard Options:
Project name
DOI (optional, but please use the CHORDS DOI of 10.5065/d6v1236q or another DOI that is linked to the CHORDS DOI in the metadata)
Affiliation
Page title (e.g. the name of the project you’re working such as “Orcas”, “3D-PAWS”, “STORM”, “NCAR weather stations”, etc.)
Domain name The domain name should either be the fully qualified domain name of the portal (if you have one) or the IP address of the server on which the portal is hosted, e.g. from AWS. Make sure to change the default value as the archiving function may fail if it is not set!
Data Archive URL This is the link to the archive of data being ingested by CHORDS. Users will generally archive the data in the portal on regular intervals.
Time Zone
Project Description A short description of your project. This may use [HTML Markup]. If you haven’t used HTML markup or aren’t sure what it is, you may see this link.
Logo File You may upload a customized logo for your portal here. It will appear in the portal header page.
Max Download Points Set how many maximum points you want in your data downloading.
Note: Do NOT make this blank
Select Security options Default security options enable others to view data. If you don’t want to let guests or others view your data check “Restrict view of data”. Do NOT modify the Measurement Security Key
- Select Metadata Ontology Vocabularies.
- Enter CUAHSI Data Services, if desired.
- Fill out contact information.
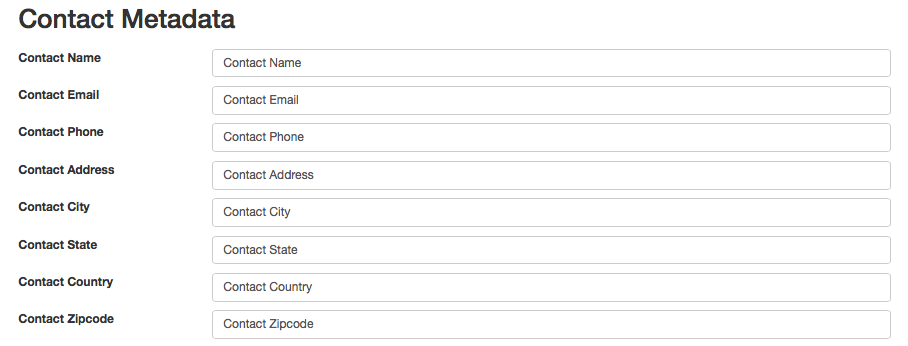
- Press Save.

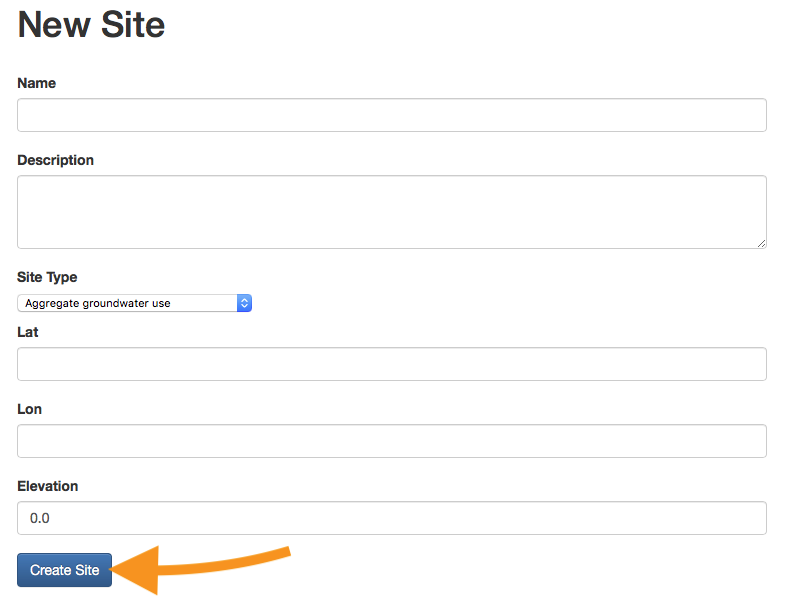
Sites
Create a new site by clicking on Sites in the middle left part of the menu.
Click the New Site button
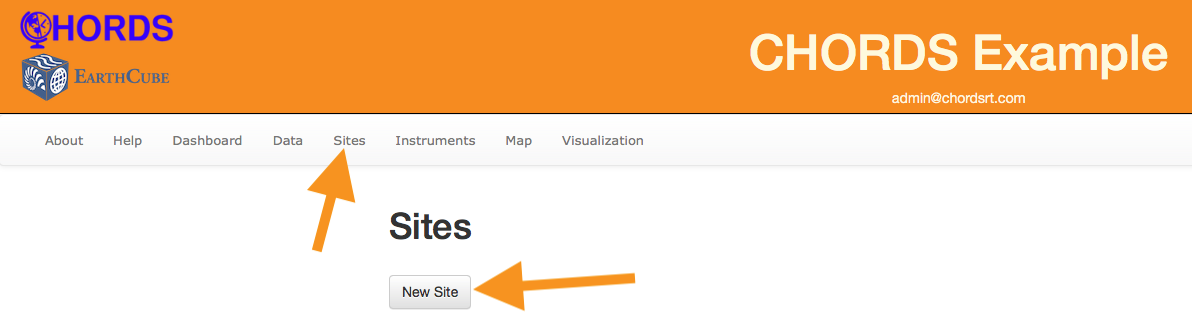
Fill out the empty fields
Click Create Site
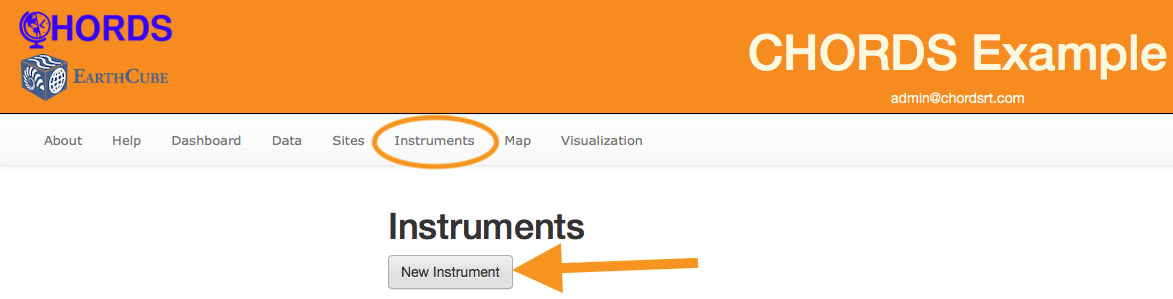
Instruments
Click on the Instruments button in the middle left part of the screen
Click New Instrument
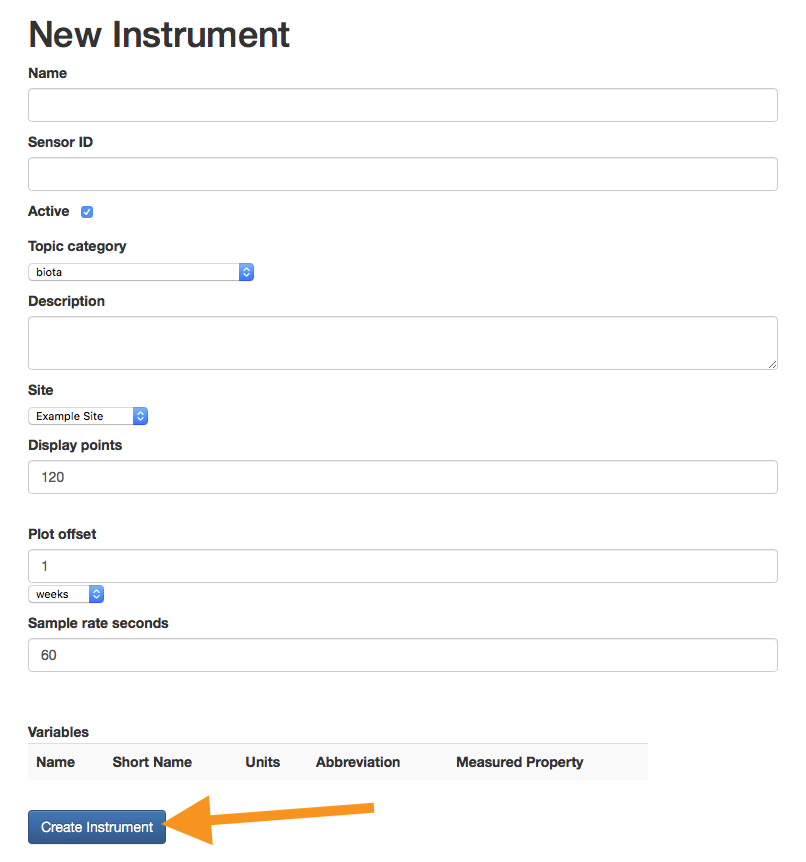
Fill out the blank spaces and click Create Instrument
Definitions
Name: Name you gave the instrument
Sensor_Id: ID for a specific sensor. This takes priority over Instrument_ID and creates a unique key. This allows the sensor to be moved from one instrument to another if need be and still retain the same URL format for uploading data.
Topic Category: Pull down menu of categories and instruments
Description: (Add additional information you feel necessary here. Like location, website, or purpose.)
Site: Place instrument is located at.
Display Points: How many points are shown on the graph.
Plot offset: Time the plot for display.
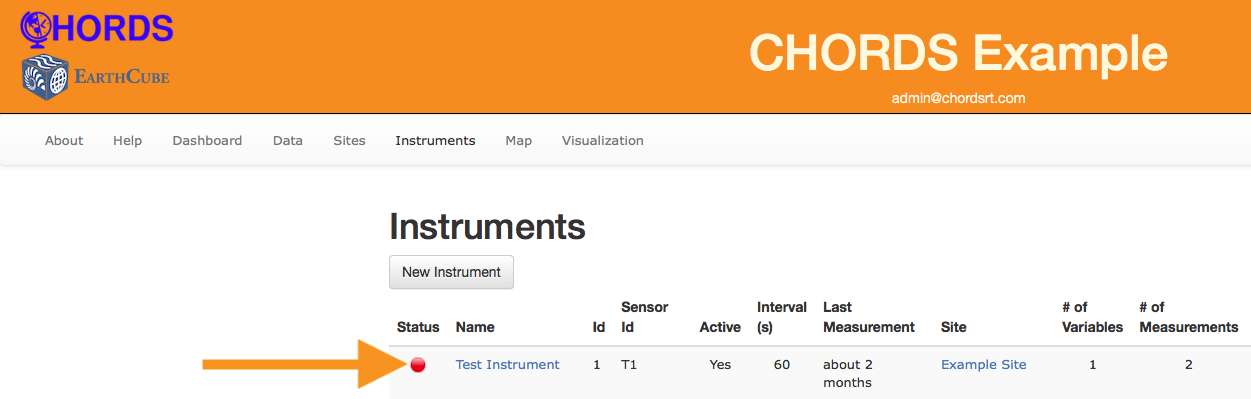
Sample Rate: How often you are sampling data, in seconds (fastest is 1 second). It is also used for visual purposes as this determines when the little circle next to the instrument is green or red.
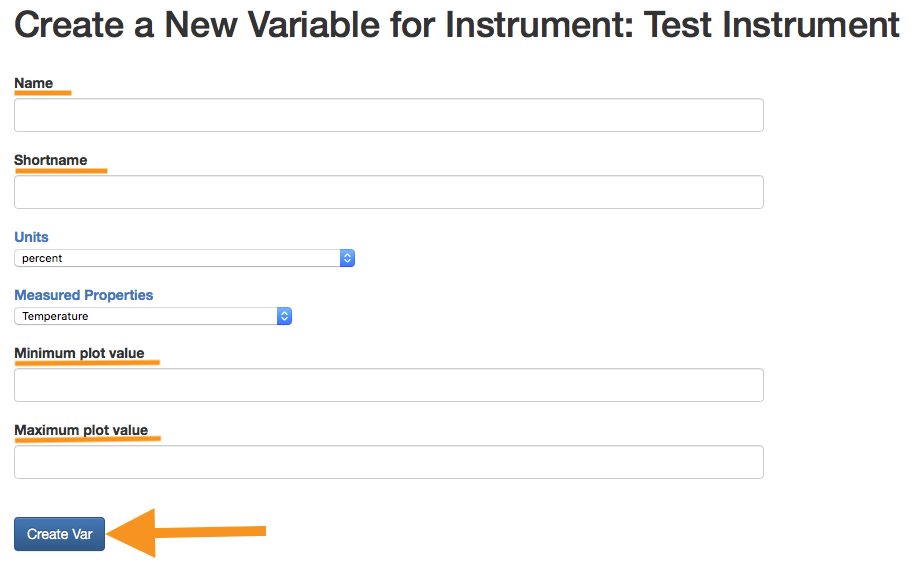
Variables
Click on your Instrument
Scroll down and click on Add New Variable
Change the short name, name, units, the minimum and maximum for plotting, the measured property, and general measurement category to match what your Instrument will be measuring.
Metadata
There are two key places you will want to make sure to include a little extra metadata (description of data).
First, your measured properties and units are part of the metadata, but don’t just call them T or I. One letter doesn’t count for metadata as it’s needed to describe what the data is showing. So give it a more descriptive name (temp, WaterPr). Your data users will appreciate this as metadata is downloaded with your data.
Second, under your configuration page there is a section for entering JSON-LD metadata. Metadata from your entries create a JSON-LD record that is encapsulated within your Portal instance. These records allow Google (through its Data Set Search tool) and other harvesters to discover the existence of your server. This increases the visibility of your data on the web. For more information visit Project 418
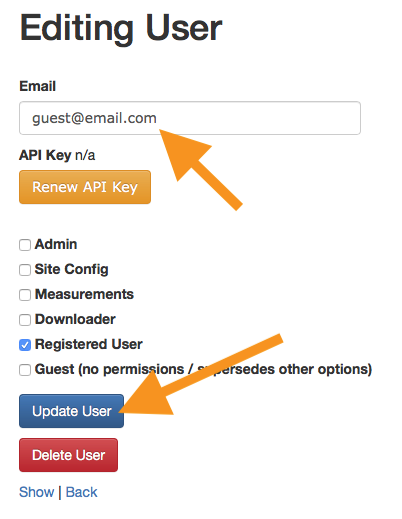
- To change an email address simply click on “Users” and then click “Edit”


- Type email into the Email Box and click “Update User”
Creating and Sending Data
Admins and Site Configs do not have permission to create test data or send data to CHORDS for security purposes. Any Registered user with Measurement Creator checked can create test data and send data to CHORDS. However Admins will have to give that user an API key. To create an API key for a user:
- Click Users
- Click the Measurement User
- Click Edit
- Click Renew API Key
User Management
Editing User Permissions
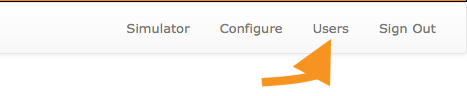
- To edit users go to the Users tab
- Click on the email/username of the user you want to edit
- Click “Edit User”
- Select the permissions you want for your user
- Make sure to unselect “guest”
- Click “Update User”
if you’re going to update a user make SURE to uncheck the “guest” box before saving your changes. If you don’t “guest” will uncheck all your previous updates and the user will have NO permissions.
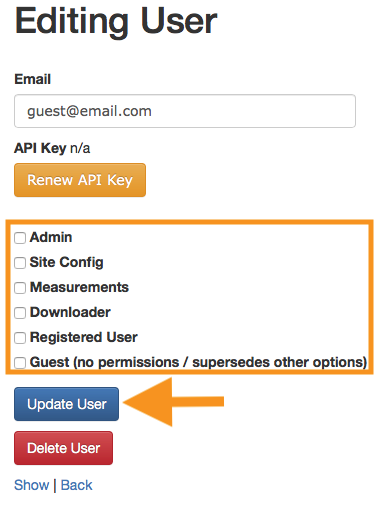
IF you select Guest in user configuration it will unselect ALL other options. Please make sure to unselect Guest before you save User Permissions.
Guest: The Default for any new user except Admins. It has the minimum permissions and users should request that their Admin upgrade them to a Registered user at the least.
A Guest User Can
- Read About page
- View self information
Registered User: This option is better than Guest but still limited in use. Combining it with Data Downloader or Measurement Creator will enable extra functionality in CHORDS giving your Registered User’s more POWER. Just make sure to use your powers for good and not evil, ok?
A Registered User Can
- Read About page and view data
- View Site
- View Instruments
- Can View and edit self information
Data Downloader: You guessed it. This option lets Registered Users view and download data from instruments.
A Data Downloader Can
- Download data
- View Instruments, (only if combined with Registered user)
Measurement Creator: Behold! The power of creation! This option let’s Registered Users view and create instruments and variables.
Measurement Creator Can
- Create test data
- Create test measurements
Site Config: This user is similar to an Admin. They can do everything except editing users and creating test data.
A Site Config Can
- Edit Site Configuration
- Read About page and view data
- View Site
- View Instruments
- Can View and edit self information
- Download data
- View Instruments
- Create Instruments