Create an AWS Portal
If someone else has already created a Portal for you, you can skip Portal creation. Just point your browser at the new Portal and perform the initial login as user: admin@chordsrt.com, password: realtimedata. You will be prompted to change the password during this first login. You can then proceed to Site configuration.
The Portal runs as a standalone web server on Amazon Web Services (AWS). The interface to AWS can seem a bit overwhelming (currently offering 52 services!).
We use the AWS CloudFormation service to create a new portal. The steps are simple.
Go ahead and log into your AWS account in your browser. We will come back to it shortly.
1. Fetch the CloudFormation template
CloudFormation uses a template file, which you need to get from the CHORDS GitHub project. A simple way to do this is just to cut and paste the text from your browser, into a local file on your computer.
In a new browser tab, open the CloudFormation template file.
Copy and paste the text into a local file named chords_cf_template.yml on your computer. It’s
a long file, so be sure to scroll all of the way to the bottom and copy all of the text.
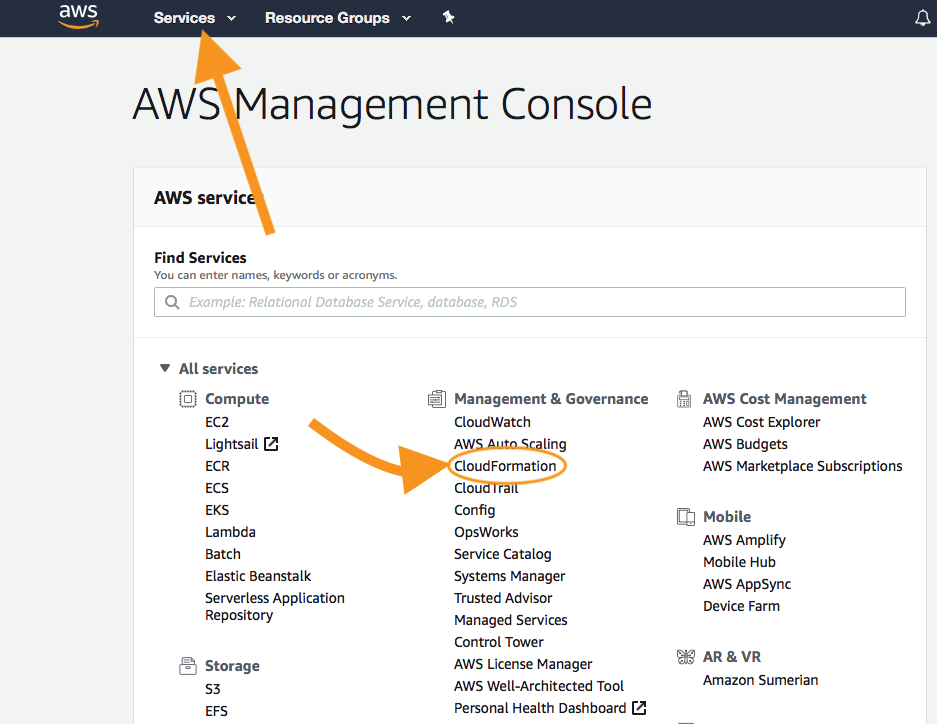
2. Run CloudFormation
- First click on “Services” and then click on “Cloud Formation”
3. Start stack creation and upload the template

-
Click Create new stack
-
Click on Upload a template file and then choose your local template file (
chords_cf_template.yml) for uploading:

- Click Next
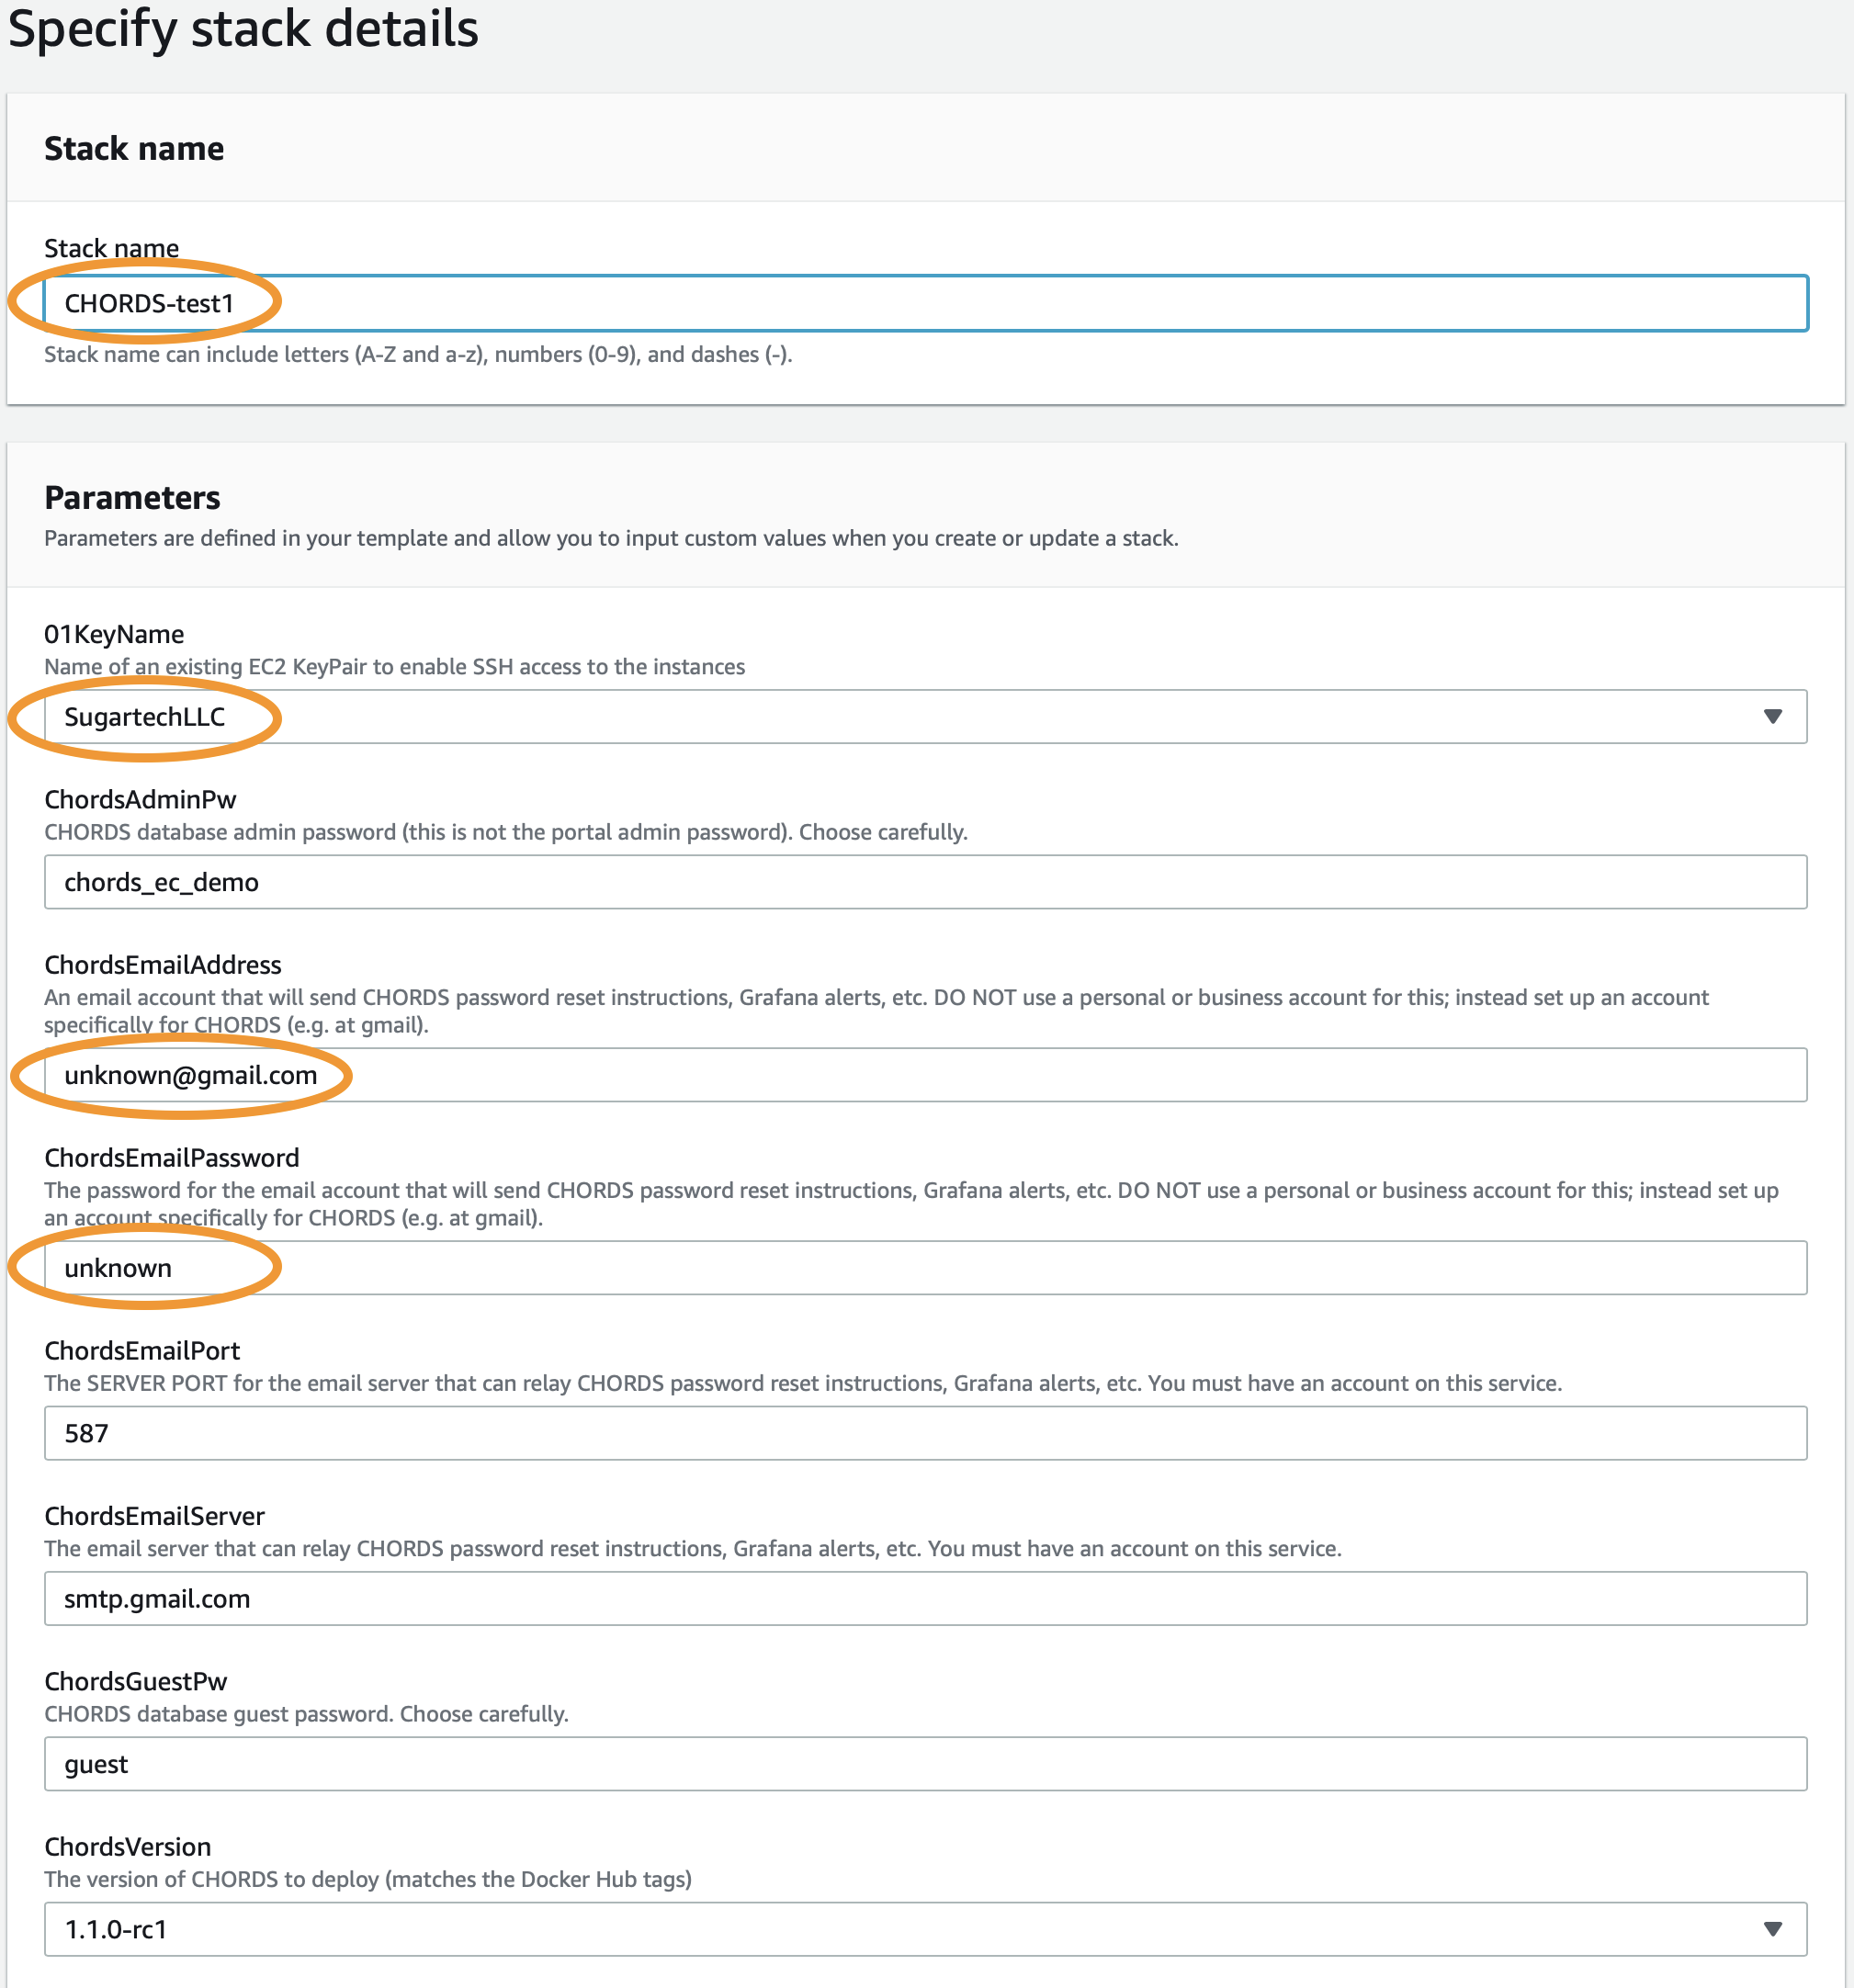
4. Specify stack details
- Give the stack a name. The convention is CHORDS- suffixed with your project or organization name, e.g. CHORDS-CSURadar.
- You will need to create a key pair for your Amazon account if you have not already done so. You can see instructions about how to do this on Step 4 of Setting up your Amazon Account. Then select an EC2 KeyPair that you created for KeyName. This will allow you to ssh into the instance, if ever needed.
The ChordsEmailAddress and ChordsEmailPassword parameters are not required, but can be used to
specify an email account that can be used for email forwarding of password reset requests and grafana alerts.
Gmail is typically used for this. Since the email credentials are stored on this CHORDS server instance,
you really should create an email account to be used specifically and only for this purpose.
(Note: you must enable 2FA and create an App password, using the
google account ‘Security->Signing into Google’ settings. Be sure to save the App password.
Use the gmail account and the App password as the CHORDS email settings.
It can be tricky to get the email forwarding to work.)
For demonstrations and simple, low-bandwidth streaming feeds, select a t2.micro instance type which are free of charge for the first year. Otherwise, select a more capable instance. t2.small provides good responsiveness for sites with half a dozen instruments, and t2.medium has succesfully hosted sites with 50 instruments, or those with higher frequency (>1 Hz) data streams.
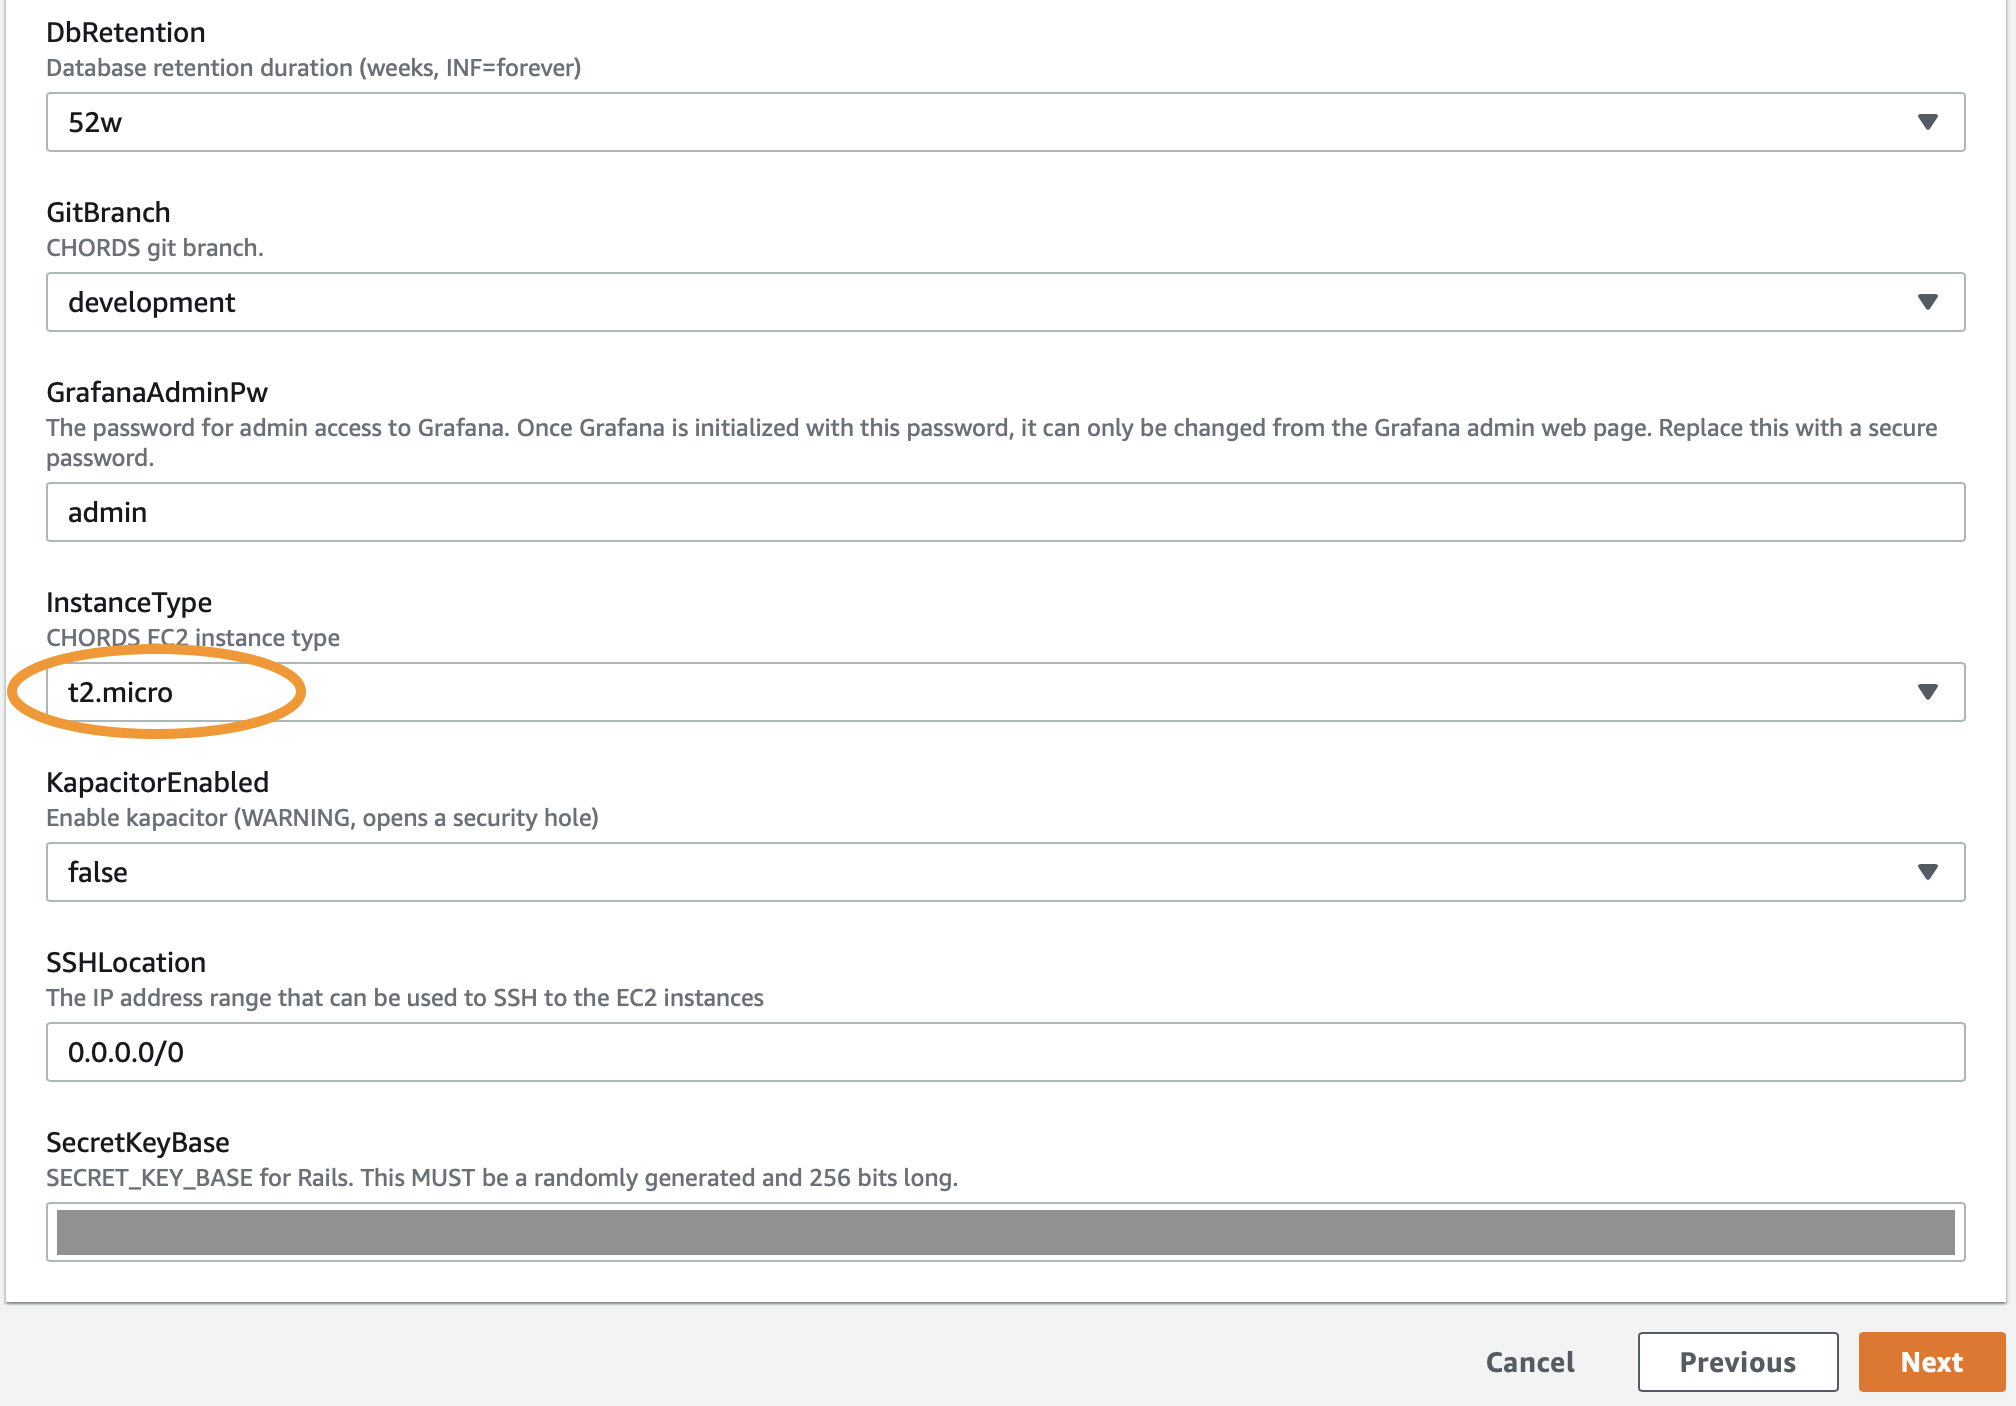
- Hit Next
5. Configure stack options
- Click Stack creation options
- Rollback on failure: Disabled
- Termination protection: Enabled

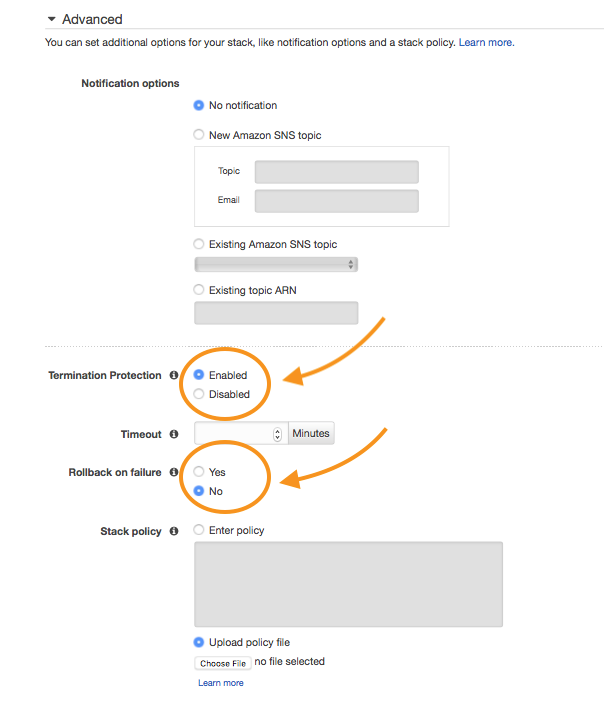
- Hit Next.
6. Review
- Verify that everything looks good and then click Create Stack

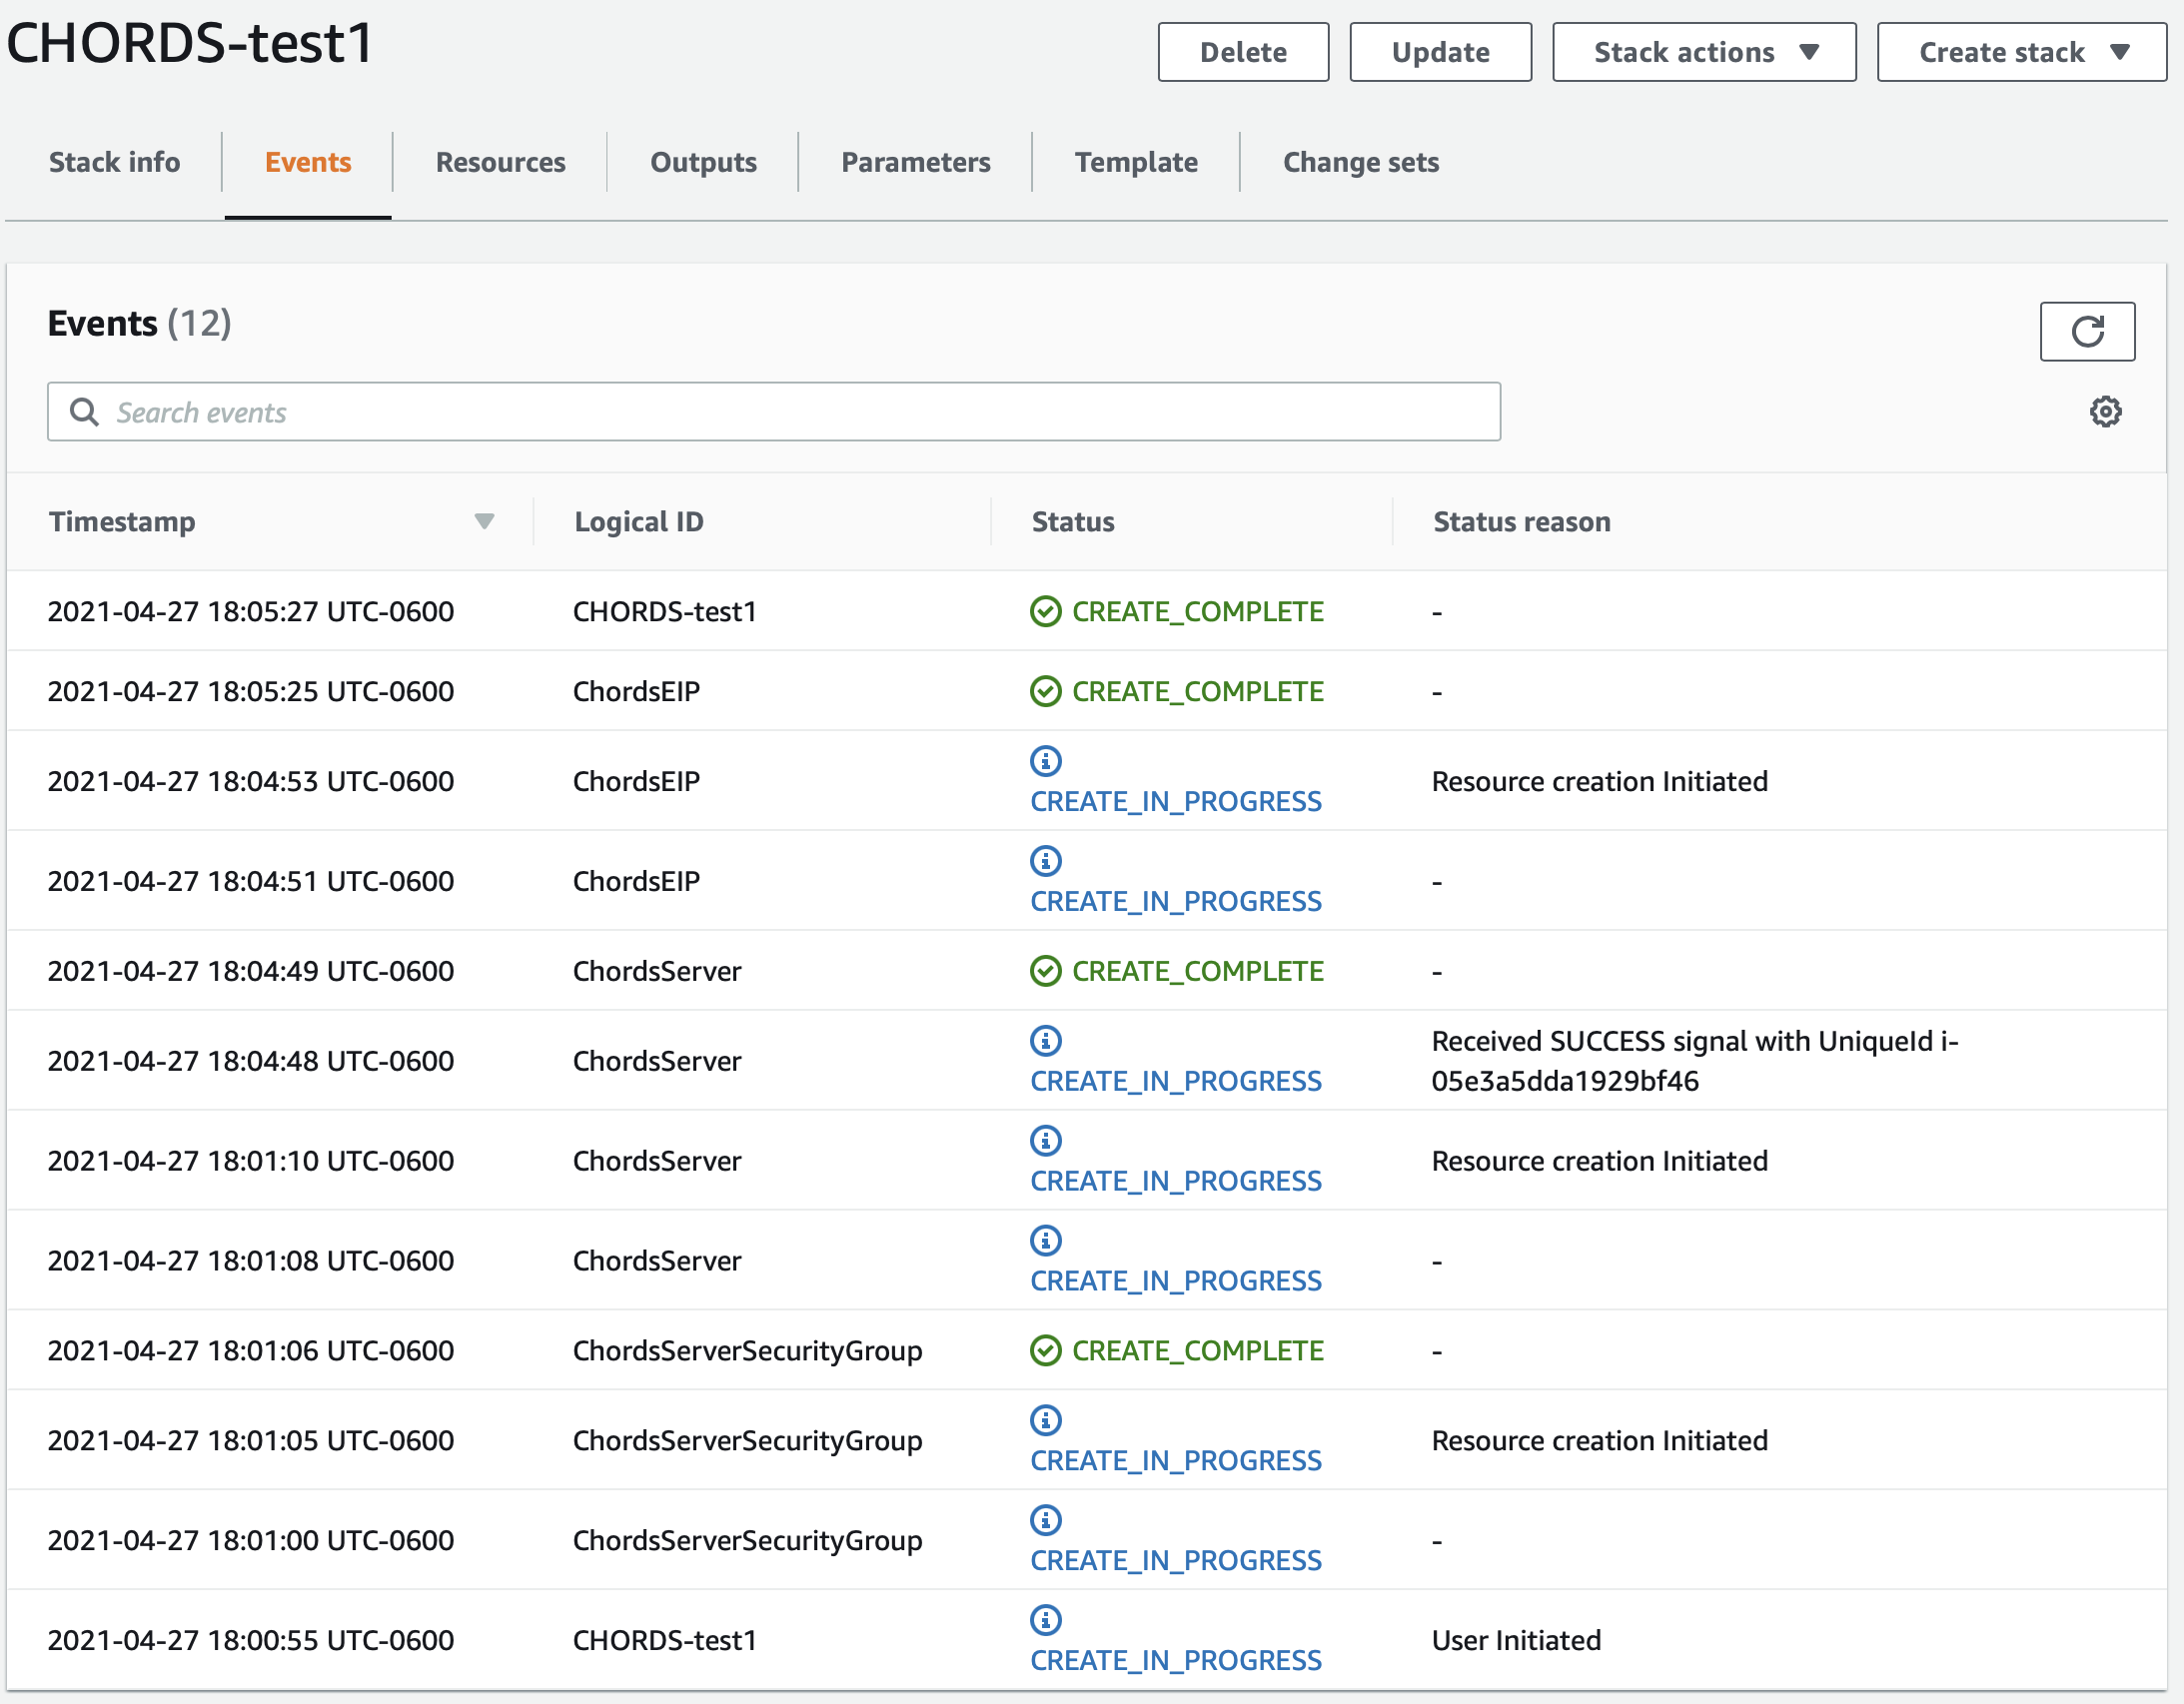
7. Wait for the portal to be created
- After the creation has started, you will be taken to the stack summary page. Go to the Events tab to watch the progress of the stack creation. It usually takes about 6 minutes to complete, but it can take much longer (even 30 minutes), depending upon AWS performance.
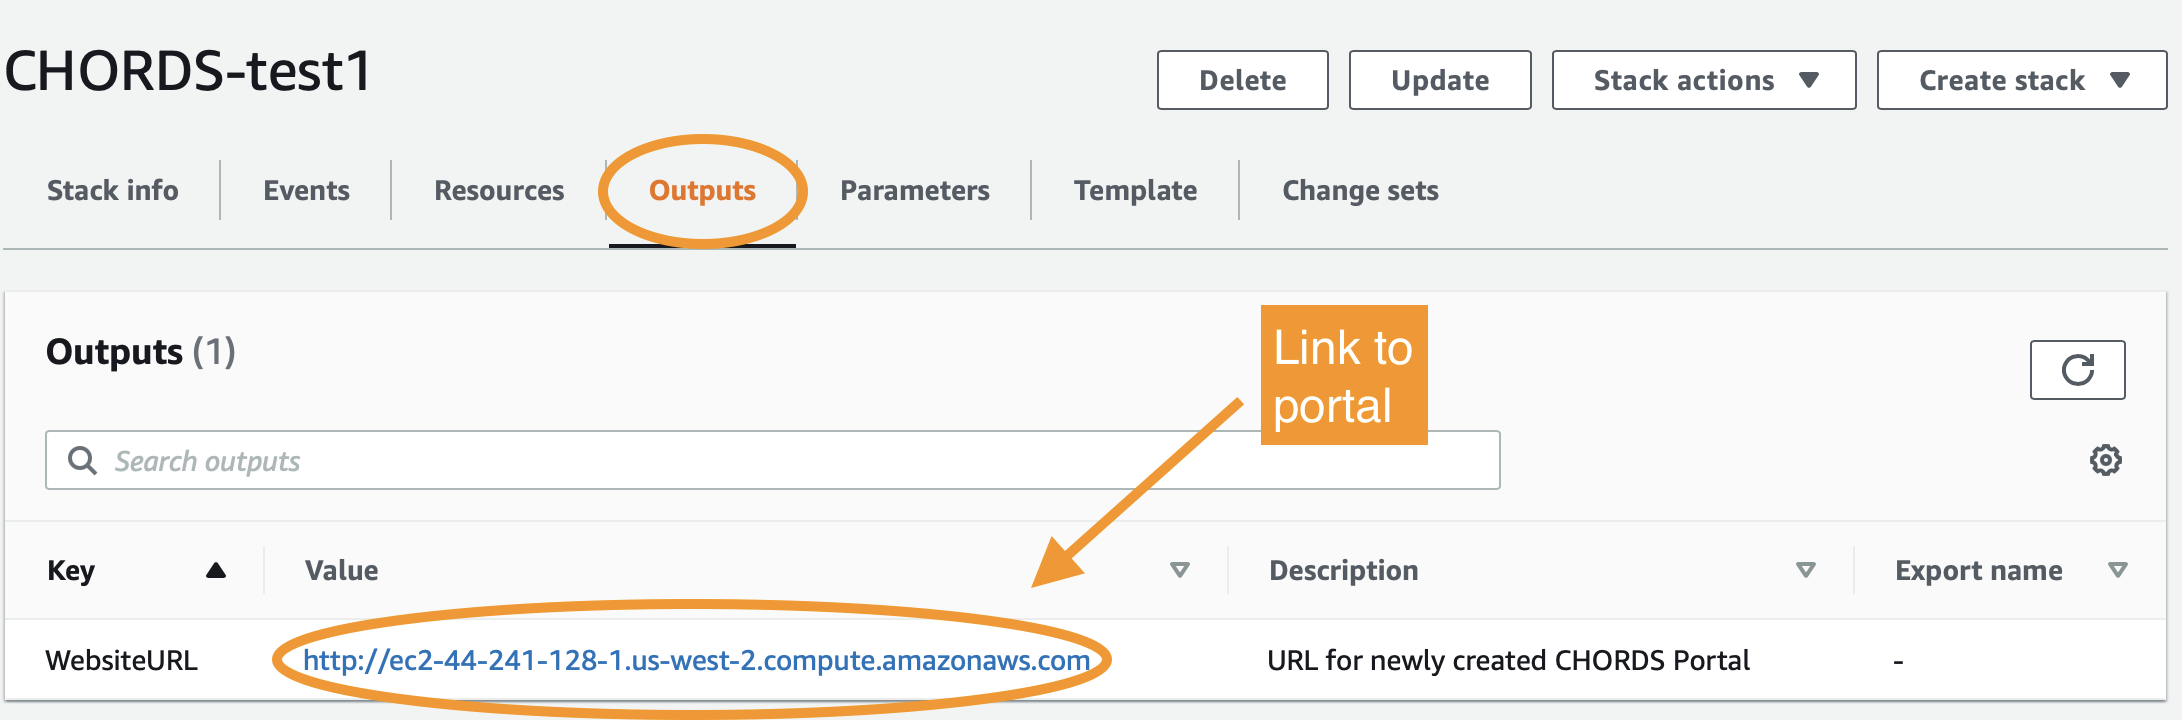
8. Accessing the new portal
Once your portal is created, select the “Outputs” tab. Click on the URL to access your new portal.
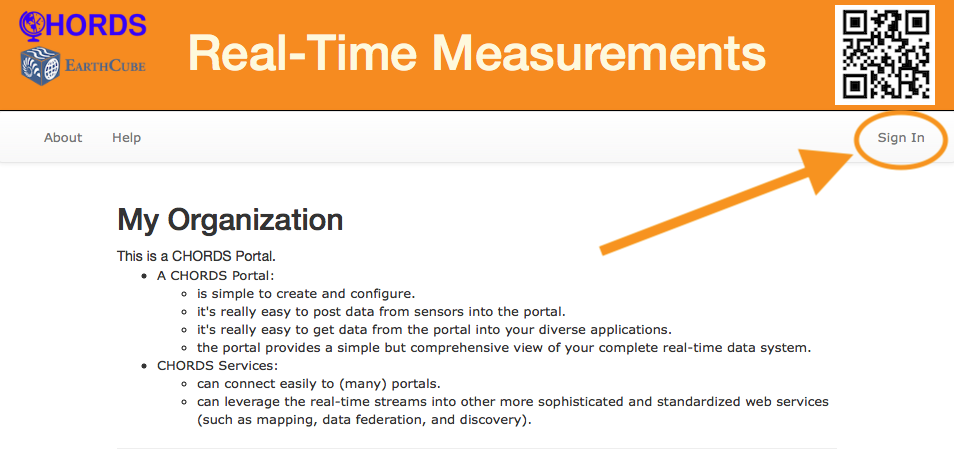
9. Log Into to Your Brand-New CHORDS Portal!
- Click on the “Sign in”
Once the Portal is running, you will want to immediately change the admin acount and password to your own email and password.
- Log into your new portal, as user: admin@chordsrt.com, and password: realtimedata
- Click on Users, then click on admin@chordsrt.com
- Click Edit User
- Change your email and then click Change Password
- Enter your new password and use realtimedata as your old password to confirm the change
- Click Update
If something breaks
- If the provisioning fails, the instance will be stopped, and you probably won't know why :-). Since the rollback was disabled, it may be possible to ssh into the portal in order to obtain some diagnostics related to the problem.